I went for the cheaper dji RSC 2 (not the RS2) because I am not a filmmaker and use the gimbal only for short video sequences, b-roll and interviews. I need a gimbal that performs very well but one that I can use hassle-free during a shoot. I need to be able to switch from shooting photographs to filming within a few minutes (the quicker the better).
It stresses me out when you need nitty-gritty technical skills to film your clips. For me, things have to be easy. Yet, the results have to look perfectly fine!

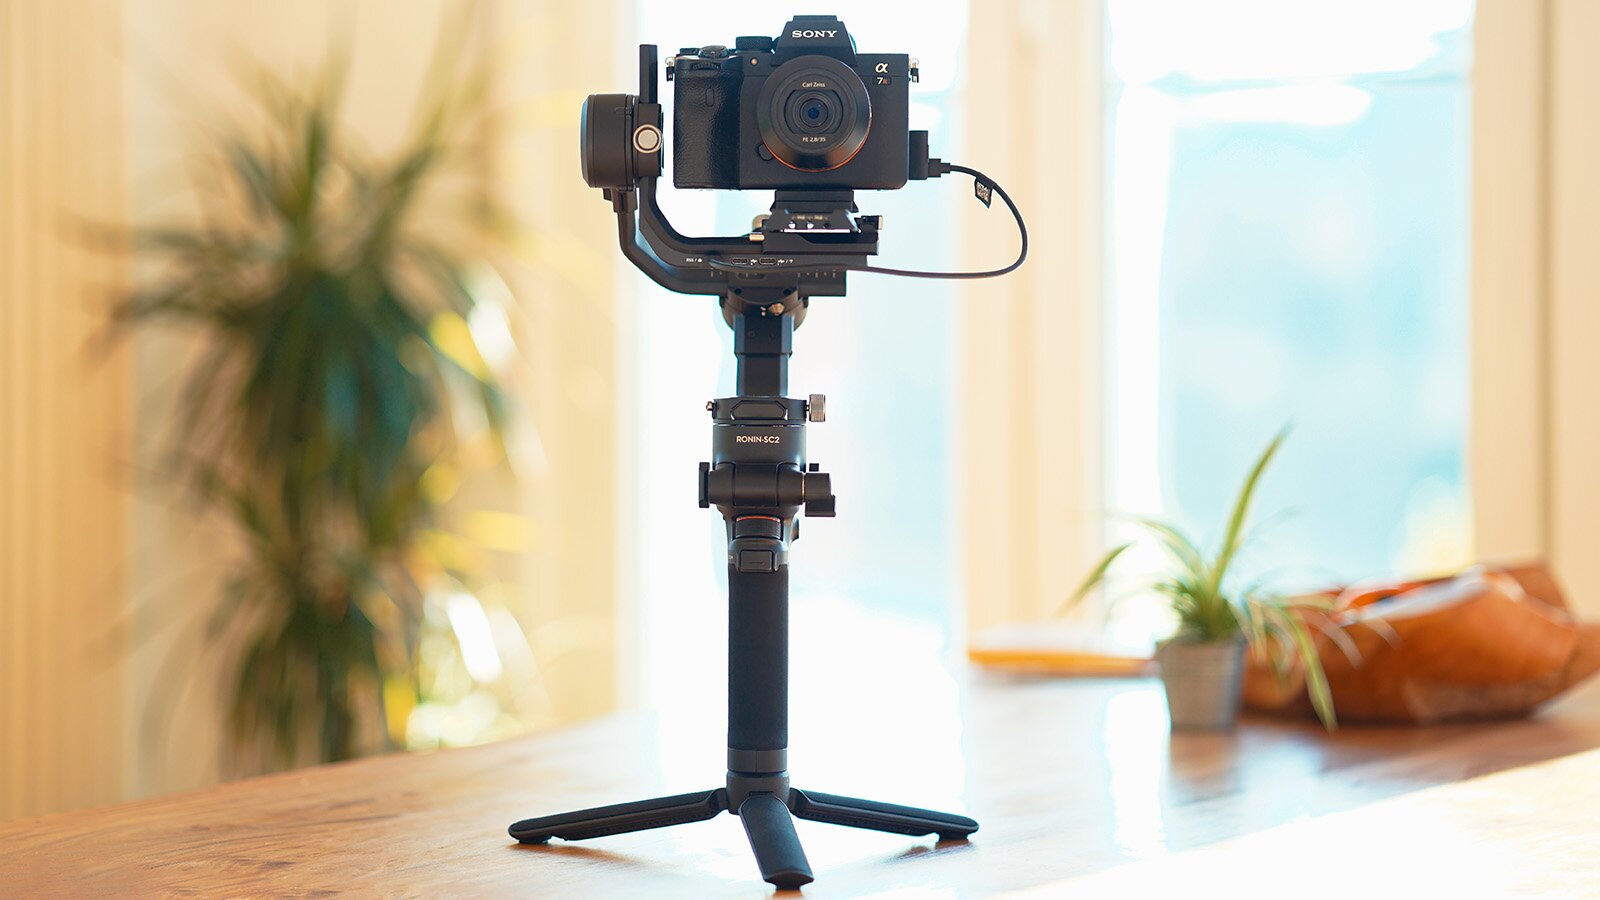
DJI RSC 2 Feature List
- Quick-release plate which allows me to take my camera off the gimbal to photograph and mount it back on the gimbal in just a few seconds without having to re-balance
- Direct view on the screen while filming without an external monitor
- Quickly switch from upright mode to briefcase mode (allows low-angle filming)
- Independently lockable axes which simplify mounting a camera
- Integrated tripod-stand
- Grip handle shows battery life and what mode you are in
- Camera control possible without using the smartphone app
- Small foldable design for transport
- Built-in battery (fewer small parts)
There are many reviews out there by people who all seem to be professional filmmakers. But for the rest of us (including myself) who get easily confused when having to unfold 3 axes and begin to think three-dimensional when putting on a camera, I decided to make a simple setup guide and write down a few tips on how to use the dji RSC 2 with a Sony camera.
First of all, I find the wording a bit puzzling. Here's what the 3 axes stand for:
TILT
Points the camera up or down
ROLL
Keeps the horizon line leveled
PAN
Moves the camera left and right

How to balance the gimbal
Balancing a gimbal is crucial. The motors are strong enough to forgive badly balanced cameras. But once you make a move where the camera goes into a top down position (always looks good with a model lying on a bed), the motor will give up and your shot is ruined. This is my third gimbal and trust me, I am quite experienced in poorly balancing gimbals.
Therefore, I thought it's about time to go through the setup step by step. I recommend you to take your time before a shoot and configure your gimbal properly. It will also save on battery usage, so you can shoot for longer periods.
There are video tutorials by dji on how to set up the gimbal. I will include the clip at the bottom of this page. You can also access it from the app, but I find it more handy to have a written setup guide on one page. To have this as a quick reference guide, I made some screens for you:

Preparation
- Unfold the gimbal, lock the fold screw and keep all 3 axes locked.
- Slide in the long quick-release plate with the arrow pointing to the right. So all fasteners basically sit next to each other.
- Unlock both roll and tilt axes and position the arms, so that the word RONIN is legible the right way round. Lock the roll axis again.
Mount your camera with the lens cap already taken off.
Move the long quick-release plate slightly forward or backward to make sure, your camera isn't front or back heavy.
Balance Tilt Axis
- The tilt axis is still the only axis which is unlocked.
Move your camera poitning upwards and balance the weight by moving the tilt arm in and out until the camera doesn't move forward or backward anymore.


Establish balance
- The camera is balanced once it remains in position if you turn it up and down by 45 degree as shown in the image.
Balance Roll Axis
- Now unlock the roll axis and balance the roll arm until the camera won't turn left and right anymore and stays in a position like shown.
- Then unlock the pan axis. Now hold the grip and move it sideways around 45 degree as well. The camera shouldn't start spinning to one side. If it does, move the arm on the pan axis in or out.


Connect cable
- Mount your cable
Two cables work with Sony cameras. Both are useful, but they do different stuff. The USB-C end always goes into the far left socket labeled RSS/📷.

Cable ①: USB-C to USB-C
Connecting with this cable, you will be able to use the front dial to adjust the focus when in manual focus mode while filming. You may also change ISO vs. shutter speed or aperture.
Cable ②: USB-C to Sony-Multi
Connecting with this cable, the front dial lets you zoom (digital or optical, depending on your lens; choose focus in the front dial menu to enable zoom) and you can capture photos (when not in film mode on the Sony). Timelapse and panorama both require this cable as well. You can only use the front dial when in film mode on the Sony. Playing back a clip on the camera can be done without putting the gimbal to sleep mode.
No cable
Of course you can use a non-cable setup as well. You cannot control your camera through the gimbal and the smartphone app usage is highly limited, but you can still record a video by pressing the record button on the Sony camera. The gimbal motors work fine without a cable as well.

Self-calibration
- Place the gimbal on a flat and leveled surface, turn it on and select Auto Tune from the menu.
The gimbal will self-calibrate (takes around 20 seconds and makes some funky noise from the motors).
- Turn the mode dial on your Sony to the film icon, now turn the camera on and you're ready to start filming!
Unfortunately, the gimbal comes without a bag or case (I admit I didn't read the smallprint when ordering). And to my surprise, you cannot order a case from dji. They simply don't offer it on their website.
Nevermind, I found a great bag you can use for storing and carrying the gimbal. It's the Reisenthel toilet bag XL which you can get for about 25 EUR.
I chose a weird zebra style pattern to easily determine which is my gimbal bag. It's also good on set if bags look a bit different from another when you communicate with an assistant.


Follow modes
There are several follow modes available. In 80% of all cases, I use the Pan and Tilt Follow (PTF). When the horizon remains in level, your footage looks stable. I go with medium sensitivity as my default.
I set M2 to Pan Follow, M3 to FPV (which is Pan, Tilt and Roll). I wasn't a fan of such an all axes follow mode on my previous gimbals, but as the dji rsc 2 is so smooth, the footage actually looks quite nice in FPV. It depends on what you are filming. For a dynamic girl having fun, I can totally imagine to film a clip in FPV. It's like music video style.
You can also customize which axes you don't want to use and customize the 360 degree roll.
If there is fast action, the Sport Mode can be used.
Button functions
Red Button
- Press halfway to autofocus
- Press once to start/stop recording
- Press and hold to take a photo (when the camera is not in film mode)
Trigger
- Press and hold to enter lock mode (the camera won't move with the movement of the gimbal)
- Tap twice to re-center the gimbal
M Button
- Hold M button and hold the trigger for 5 seconds to begin auto tune
- Tap to switch between M1, M2 and M3 profiles
- Press and hold for sport mode
- Press three times to enter/exit 3d roll. In flashlight mode you can activate 360 degree auto rotation by tapping the joystick left or right twice. To stop the auto rotation tap the trigger twice.
Operation modes
There are several ways of holding the gimbal. I mainly hold it like a candle and preferably with two hands and my knees slightly bend to have as little shake as possible when walking. This mode of holding the gimbal is called the Upright Mode.
To switch to Briefcase Mode: While operating in upright mode, unscrew the fold screw and fold the gimbal (this takes some force). Now lock the screw and tap the trigger twice. Going back to upright mode, you fold it back up and also tap the trigger twice.
When you want to do these fancy rolls with your camera while filming, it's best to enter Flashlight Mode: Just tilt the gimbal forward to 90 degrees from upright mode to get into flashlight mode. As if you wanted to point a flash light away from you. It's as simple as that.
Excellent stabilization and smooth operation without having to be a pro film-maker. Yippee!
As my article is written in an operating manual style, I would like to point out that I am totally enjoying this gimbal. It's such a wonderful piece, lies well in the hand, has a great grip and works like a charme.
Traveling with batteries
Before carrying the gimbal on an airplane, it must be discharged until the battery level is lower than 30%. Such warnings should be taken seriously, I believe. At least, you reduce the risk of batteries overheating, catching fire or exploding.
Batteries always have to be in the hand luggage, never in your checked baggage. This means, the dji RSC 2 goes on board with you, always. Authorities allow a certain amount of battery power per person. Depending on the airline approval, you can carry between 100 Wh and 160 Wh in your bag on a plane.
The dji RSC 2 has (3,400 mAh at 7.2 V which equals) 24.48 Wh. I carry four Sony NP-FZ100 batteries (each 16.4 Wh), an iPhone (6 Wh) and a MacBook Air (50 Wh) which altogether results in around 146 Wh. I am already close to the official limit with such a setup — but within the guidelines.

The dji Ronin App is very nice. I don't know why people rated it with only 3 stars in the app store, because to me it is very powerful and much nicer than apps from other manufacturers. If you buy a dji gimbal you will discover this for yourself as you are forced to activate your gimbal through the app, before being able to use the gimbal (a bit of a bummer, if you ask me).
App Features
- Timelapse photos on a desired path
- Panorama shots that you can stitch together
- Setting up your user profiles M1, M2 and M3
- Force mobile: the gimbal mirrors every slightest movement of your mobile phone simultaneously. Nice gimmick. But real useful when you have the RavenEye Image Transmission System mounted.
There are a few more things I would like to say.
You can disbale the Selfie mode in the advanced menu to avoid accidently pointing the camera at yourself while filming. I also recommend to turn the Silent mode on.
In the advanced settings you can enable Push mode. This means that the gimbal will move if you (accidently) touch it by hand. It's a good idea to keep this on, so you don't fight against the motors in case your hands touch the gimbal.
My standard iPhone USB charger delivers only 5W power, so fully loading the gimbal with this piece takes around four hours. For quicker charging the rsc2 supports USB charging with up to 18W. DJI offers an 18W charger on their website, in case you wonder.
In case you move around wildly, you might want to tape the hooks for the shoulder strap on the Sony. The metal hooks make some noise. For example when you do a 360 roll they will ruin your ambient sound. Luckily, I don't use audio from my clips, so this is not an issue for my type of work.

User Manual
For more information, here's the official DJI user manual.
I created a small guide to print out and keep in your bag: Quick Reference PDF (13x19cm).
And in case you don't like reading, below you will find the official video describing how to balance the gimbal when mounting a camera.