Modern cameras take amazing images. They have a big color range, are vivid and saturated, sharp and clean. This is how the original photograph looks out of cam. No further adjustments have been made. How do you get this image to look a bit more vintage? Here are my little tweaks.


Curves adjustments
If you look at old color photographs, you can see, they have less contrast in the shadows and highlights. So, I go to Curves, choose Linear Curve from the defaults and then raise the far left (the shadows) and lower the far right (the highlights).


Exposure offset
For the next step, I want to tweak the Exposure and give it an Offset of 0,039. Don't ask me why I chose this number. I just found this value adds a nice white overlay to the image.


Black & White filter
With modern cameras basically the image is richer in color. Therefore, I want to decrease the saturation. There are many ways to do it. I decided to choose a Black & White filter and then the preset High Contrast Blue Filter which I then lowered to only 18% opacity.


Blue shadows
For the vintage look, I want to add a tint of blue to the shadows by using Solid Color and selecting the layer mode Lighten. I lower the opacity to around 30%.


Yellowish highlights
To smoothen the highlights and removing some blue from the whites, I add another Solid Color layer with a yellowish-greenish tint and selecting layer mode Multiply. It affects the whole image, but is mostly visible in the light tones (whites). I lower the opacity to around 20%.


Adding grain
To finally get the film look, we need to add grain. I create a new layer, fill it with 50% gray and set the layer style to Overlay. Then I go to Filter > Blur Tools > Field Blur and add grain to this layer. You can play with the values to get your desired type of grain. The grain depends very much on the resolution of the image. I went for a sublte grain.
Now, the image has become a bit dark, so I went back to the exposure layer and lifted the exposure to 0,3. Done!

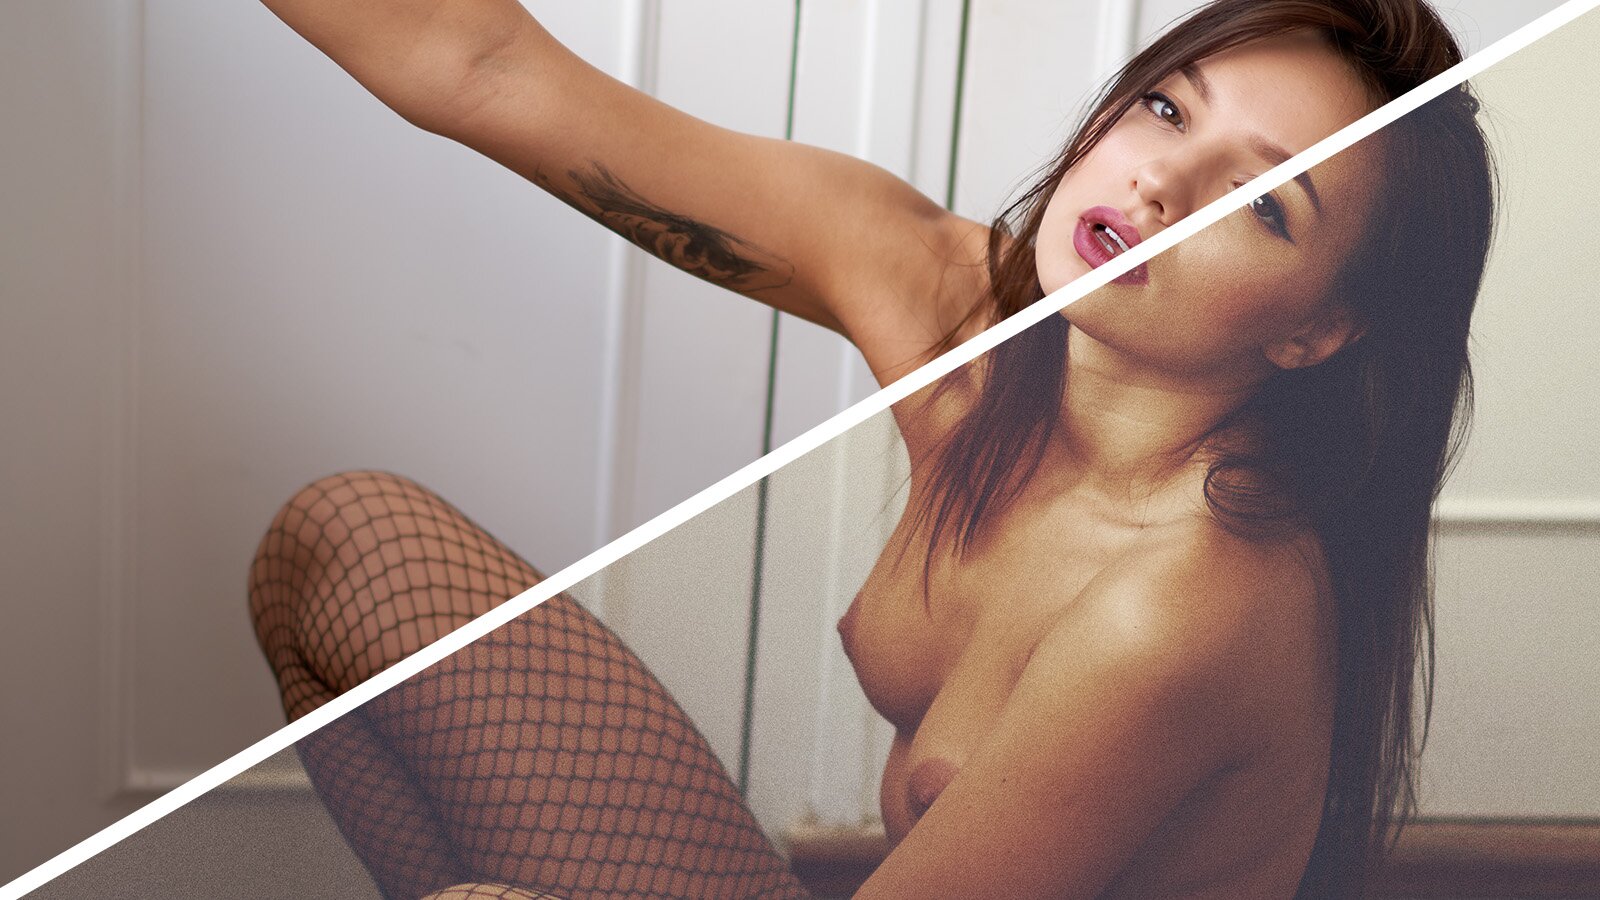
See the difference
This is how the image changed with these simple steps. Looks vintage to me, now!
Free download
As we're all lazy and I am sure you don't want to repeat these steps on your own, I made a Photoshop Action that you can download here for free. Simply download the file. Then in Photoshop, go to Actions, choose Load Action, select the file from your hard disk. On any image you can just press the play button and see what the look will result in.
The grain values highly depend on the size of your image. To adjust the grain level, double click on the layer Grain and change size and blur options to your needs.
Here's another example where I played my action on a photo I took with Terez in the sand dunes:

