Color cast exists as light is reflected by surfaces
In this article I focus on green color cast. But every reflection actually leads to color cast. If you stand in front of a red house, there will be red color cast for example. And so in nature, green from leaves and grass gets in your picture and changes the skin tone of your model.
Auto white balance struggle
Achieving accurate auto white balance (AWB) in the presence of a strong green color cast can be challenging for cameras. The auto settings, designed to adapt to various lighting conditions, struggle when faced with scenes dominated by lush greenery. The amount of green tones often leads to misinterpretations of the overall color temperature, resulting in an inaccurate white balance.
What is neutral?
The idea that a scene has to have neutral colors is perhaps wrong. Of course, this doesn't apply to every situation. If I'm selling a color, for example a red dress, then the viewer should also be shown the right red.
A green color cast looks bad because green skin is immediately associated with illness. And who wants that?
A completely neutral image would also look strange, because if the model is standing in the middle of green nature, the eye also expects a slightly green coloration. So, as always, it depends on the nuances.
Our image editing software has many possibilities to support us. I'll take an example photo and show you 15 ways to remove the color cast with Photoshop.
Initial image
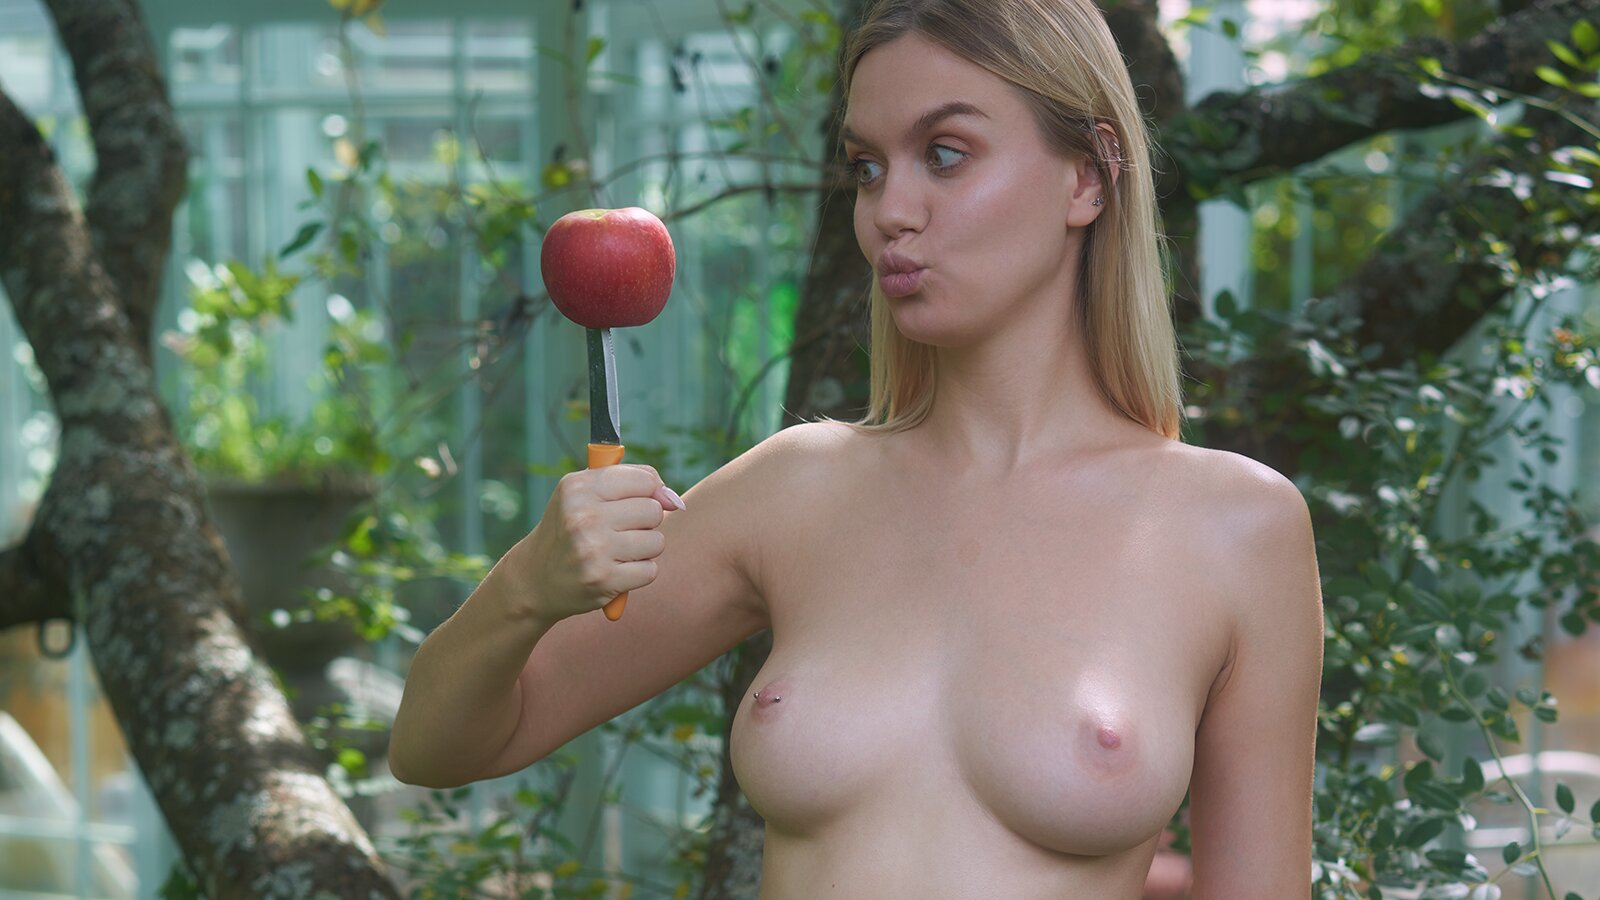
Here's a photo of Lana Lane under an apple tree in a garden. It's the unaltered original image with no adjustments done to it except for cropping square for this article.
The sun was high up and a green haze covers the photo. For all methods I describe here, please make a copy of the original layer before doing anything else. Keep the original to be able to compare or delete your adjustments and start all over again.

Levels
Go to Image > Adjustments > Levels > Channel > Green and move the middle slider slightly to the right (to 0.93 in my example). I also adjusted the left slider slightly to the right.

Match Color
Go to Image > Adjustments > Match Color and check the box "Neutral". While this method works sometimes, it does not at all in our example here and introduces a weird magenta shade almost as if the photo was shot at night time.

Auto Color
Go to Image > Auto Color and be disappointed again. Auto color does not work with this photo. And it almost never does.

Auto Tone
Go to Image > Auto Tone and while the result is better than before, the overall image looks too dark now. You could set the blending mode to color, but it still doesn't feel right. These automatic features are not the best.

Camera Raw
Go to Filter > Camera Raw > Light > White Balance and select "Auto" in the dropdown. The result first looks a bit too heavy. But if you reduce the opacity of this layer to 50% it's not so bad.

Hue/Saturation
Go to Image > Adjustments > Hue/Saturation. As we want to adjust the skin tone, choose Yellows from the Master dropdown and then use the color picker to pick the tone on her cheeks for example. The dropdown will change the name to "Yellows 2", don't be surprised. Now, change the hue of the skin towards yellow (away from the greens), in this case -9.

Color Balance
Go to Image > Adjustments > Color Balance and with the midtones, move the Magenta-Green slider towards Magenta. In this case -9.

Selective Color
Go to Image > Adjustments > Selective Color and pick the color yellow as we want to adjust the skin. I adjusted Cyan -6 and Magenta +18 in this example.

Curves
Go to Image > Adjustments > Curves and choose the color picker in the middle which is for the gray point. Now, find a point in your image that should have a medium gray, in this case, I went for the blade of the knife. Tricky, not very accurate and not quite right.

Replace Color
Go to Image > Adjustments > Replace Color and pick the face. Play with the fuzziness to select as much skin as possible. Now, simply change the hue, in my case to -9. While the result looks good, this method is not my preferred one as I always fear, it might result in some weird pixel artifacts somewhere in the image.
I wish the slider was a bit more sensitive and the selection could be softer. I'm sure there are workarounds for this, but I want to show the most simple methods in this article.

Solid Color ⭐
My personal favorite approach.
This method is inspired by noise-canceling headphones.
Use the color picker with the 51 by 51 average selected. Now, pick a place in the leaves with a green tone that could resemble the color cast. Use the tool below to find the complementary color to the green you picked. Make a solid color layer with this color and change the blend mode to soft light (or alternatively to overlay) and set the opacity to 50%. With this method you are trying to equal out the color cast.
This makes a good starting point before the actual color grading, e.g. with my LUTs.

Complementary Color Calculator
Enter Hex Color (in this case, a green value)
Photo Filter
This is kind of the same approach, only simplified. Just add a photo filter and choose the default violet color with the default 25% strength. Not so bad, either. Probably the winner in terms of simplicity.

Channel Mixer
Go to Image > Adjustments > Channel Mixer. Pick the green channel and set green to only 93%.

Blur Average
Make yet one more copy of your original image and go to Filter > Blur > Average. Now, you have one single color. Add a curves adjustment layer and use the color picker in the middle (gray tone) and click on your one colored image. Delete the one colored image and set the blend mode of the curves adjustment layer to color.

Conclusion
Some results are really bad. Some are ok. And some feel pleasing. I have used all of these tools to remove color cast in my photos in the past. Like I said, there's no right or wrong here. You have to find out what method suits you best and which results you prefer.
My favorite methods to remove green color cast are "Solid Color", "Channel Mixer" and "Photo Filter" (in this order). This is also a note to myself not to fiddle too long with "Selective Color" like I have done in the past.